


Fuel Tank Install
- Jul 17, 2015
Note - our project car here is a 1969 Chevelle. For your convenience, we've listed the part numbers. You can easily look up your specific year Chevelle's part numbers at http://www.ecklerschevelle.com/

This is our "before" shot– ugly, smelly, drastically in need of improvements!
Let’s get at it...
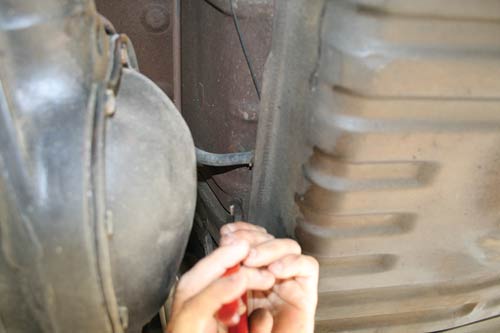
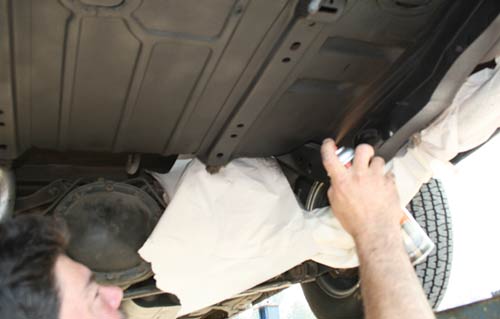
Although you could probably accomplish this task by putting the car up on a set of service ramps, a lift going to make life much easier. Start by disconnecting the two vent hoses that are located near the top of the tank.
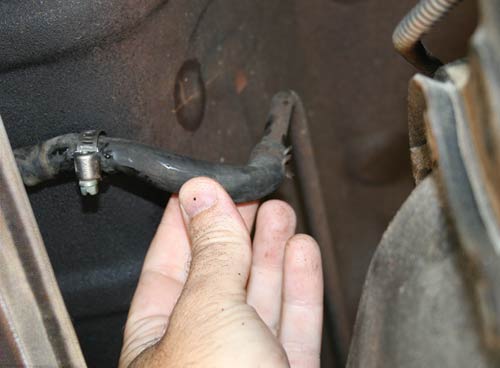
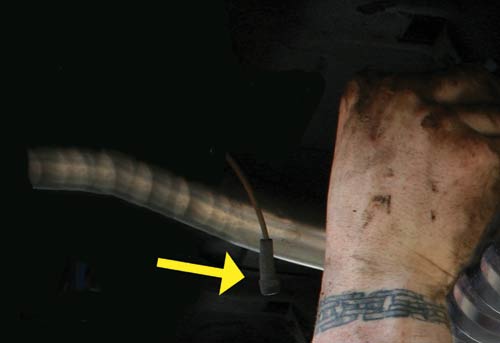
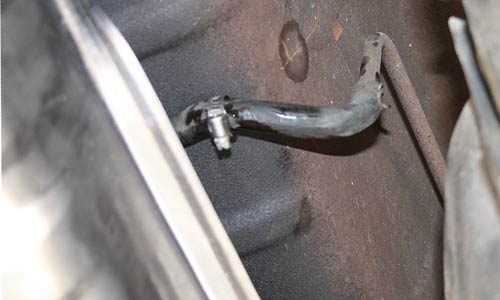
The flexible hose that connects the hard fuel line to the line that comes off the sending unit is removed.
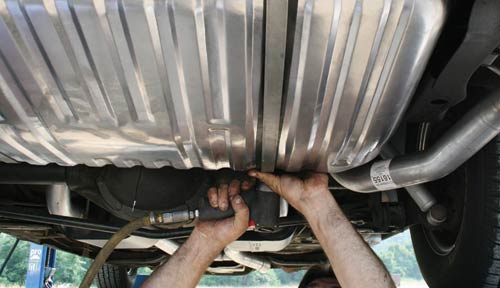
Next, we unplugged the connection that sends power to the sending unit. This connects to the rear main wiring harness.
The fuel tank mounting straps are removed (two bolts each strap). Here’s where you’ll need another set of hands– someone to support the tank while you un-bolt the straps.
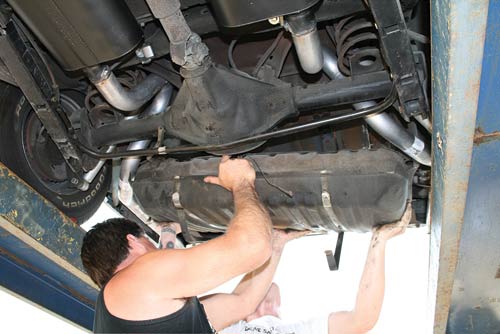
The grimy old tank is removed. It was about a 1/4 full of gas, which we eventually drained and put into the new tank.

The original tank actually still looks pretty good from this never-seen view. The sound/rattle insulation pad was holding together quite well after 45 years of service.

All that nastiness up there on the right side of this photo is the result of moisture collecting in the trunk over the years. Rotten weatherstripping was the culprit. Our Chevelle’s floor pans were very solid though, so we were fortunate. This above section of the trunk pan was another matter altogether. A fiberglass patch and some POR-15 fixed the problem area.
It’s not very often you have to remove your fuel tank, so while we’re presented with this golden opportunity, might as well use some 3M Rubberized Undercoating to take care of the area. The product description: “Rapid drying, paintable, rubberized undercoating material for rust-proofing and sound deadening. Ideal for coating fenders, quarter panels, door panels, repaired sections, welded joints, hoods, and decks”. Check out http://www.ecklerschevelle.com/3m-rubberized-undercoating.html
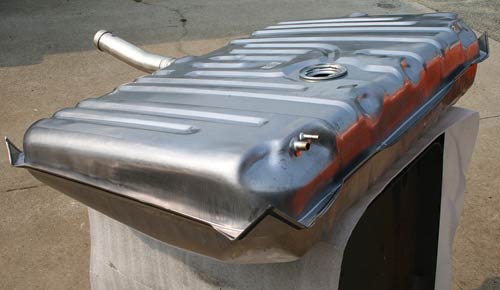
The new fuel tank. Here's the part # for 1968-69 Chevrolet: http://www.ecklerschevelle.com/chevelle-gas-tank-1968-1969.html
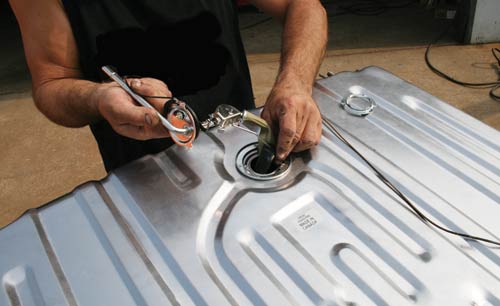
The new fuel sending unit: http://www.ecklerschevelle.com/chevelle-gas-tank-sending-unit-3-8-with-vapor-return-line-for-cars-with-4-barrel-carburetor-except-wagons-1969-1970.html gets installed in the fresh tank.
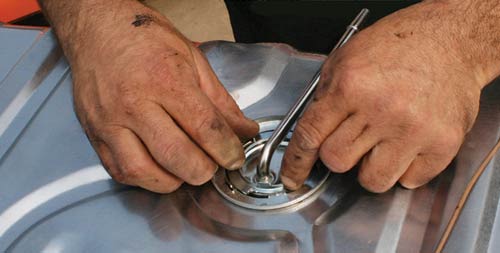
The retaining ring twists into place, securing the sending unit in position in the top of the tank’s opening.

The power connection is affixed to the terminal on top of the sending unit.
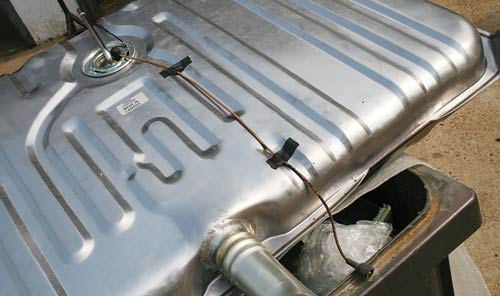
This is how everything should look, all prepped to go back in the car. The wire is affixed with electrical tape, and will plug back into the rear wiring harness behind the bumper.
Since our original fuel tank straps were just about as nasty as our tank, we used new ones– part http://www.ecklerschevelle.com/chevelle-gas-tank-mounting-straps-for-cars-except-wagons-1968-1972.html

We negelected to order a new chunk of Dynamat insulation for the top of the tank. We ended up re-using our old one. The original breather hoses are utilized as well. All were in good shape.
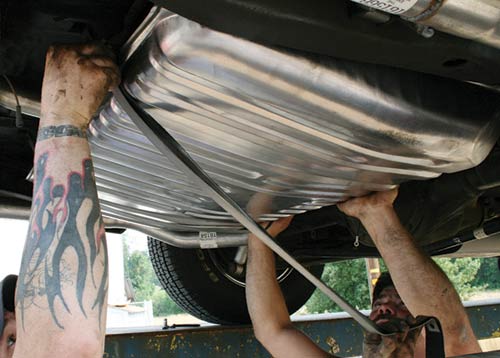
Here we’re getting the new tank into position. Be sure the new anti-squeak rubber strips are fitting properly between the mounting straps and tank. This is another step where an extra set of helping hands comes in handy! http://www.ecklerschevelle.com/chevelle-gas-tank-anti-squeak-set-1964-1983.html
The new tank is secured by tightening up the strap bolts.
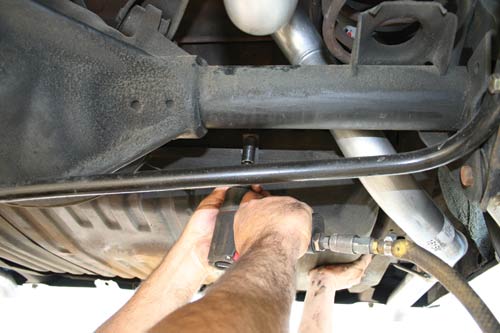
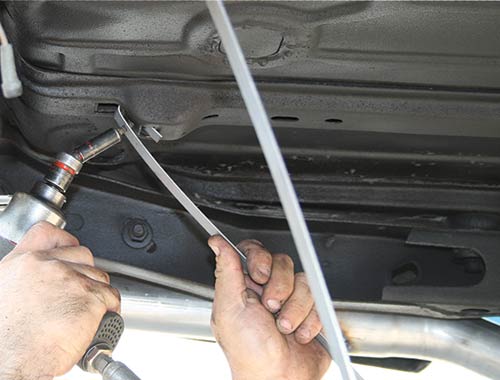
The hard line coming off the tank (out of the sending unit) is connected back to the main fuel line. We also connected the ground wire leading off the sending unit to its original spot on the Chevelle’s undercarriage.
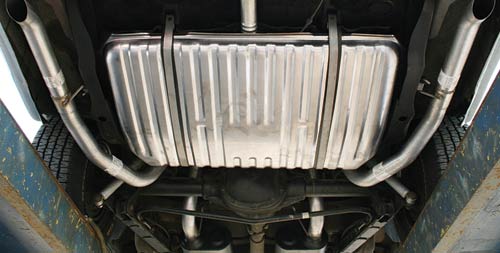
Here we are, all done. The shiny new tank matches that new exhaust system nicely! It especially looks great against the freshly undercoated trunk pan section. We fed the approximately 5 gallons of fuel we had in our old tank to our new one.


