


Steering Wheel Restoration
- Oct 2, 2015
How to Restore Your Steering Wheel
Text and Photography by Jeff Ford
Time: 3-4 hours (approximately)
Cost: Approximately $45 for Eastwood’s Steering Wheel Restoration Kit (available at Eckler's)
Tinware: Dremel tool kit, or similar brand. Steering wheel puller, selection of putty knives, various sandpaper grits ranging from 80 through 600-800 grit
Tip: Thoroughly degrease the wheel before applying paint!
We grab it, whack it, drum it, get it sweaty and some of us even pick at it when we are frustrated. We also subject it to blistering heat and frigid cold throughout its life cycle. It’s the first thing we see when we get in and the last thing we grab when we are getting out. We present to you: the steering wheel. This modified tiller takes a lot of guff from us drivers over the course of its life. The above mentioned scenarios are but a few of the ones we have seen and, well, if the truth be known, participated in.
Obviously, there are reproduction steering wheels available for many brands nowadays, but there’s always “that one”– the model or year that’s just not available, or maybe you just don’t want to shell out the bucks. We’re here to show you how you can get your old, cracked steering wheel back into showroom shape.
We found that a product from the Eastwood Company called “PC7” was great for building areas like the rib on the spokes and for filling in the voids. We have since subjected the wheel to temperature changes varying from the low 30s/high 20s up into the 80s with no discernible cracking. Keep in mind that this type of work will require some finesse and patience. In the end though, you’ll be well satisfied with the results.
First off, you’ll need to remove your steering wheel. Use a steering wheel puller, available on any of Eckler’s brands websites.
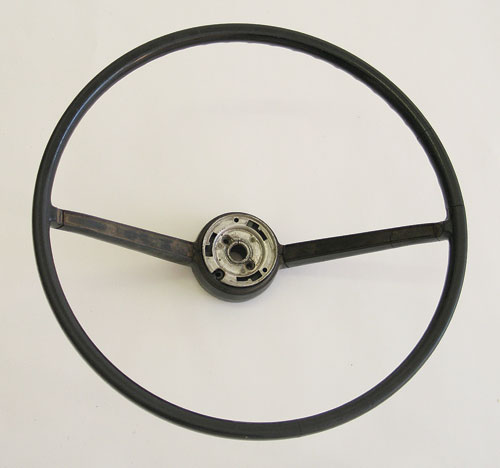
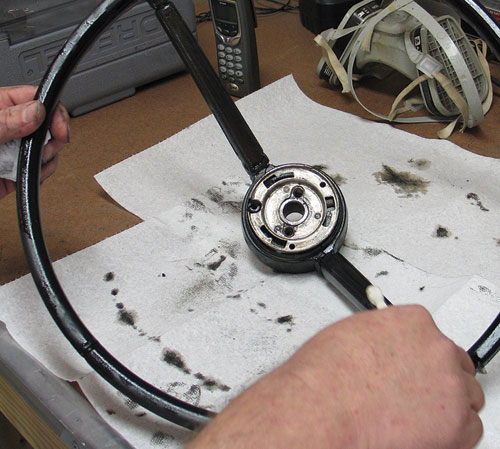
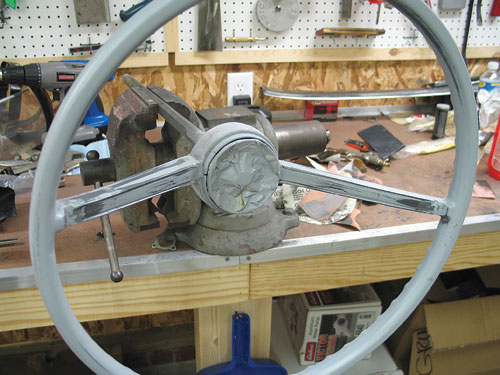
Our wheel, out of the car. You don’t realize how ugly one of these worn originals is until you remove it from the car. During the ’60s, Chevy painted most of their steering wheels.
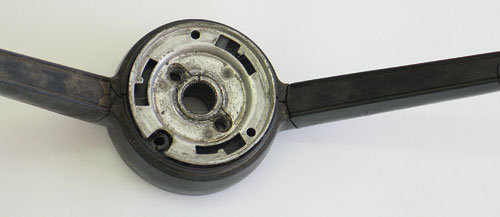
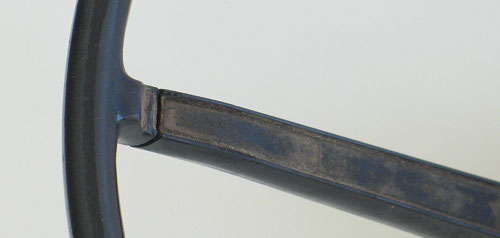
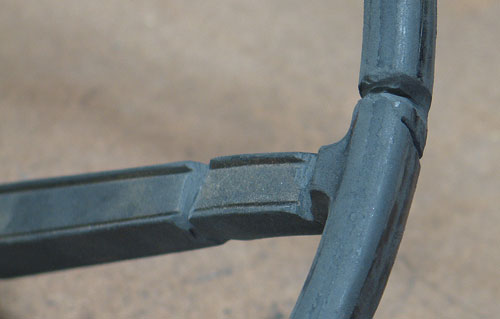
With the horn ring off, it’s easy to see the damage old man time has wreaked on this tired specimen. Cracks are everywhere. Typically these wheels will crack at the inner hub and outer spoke. They will also shrink and crack around the wheel itself.
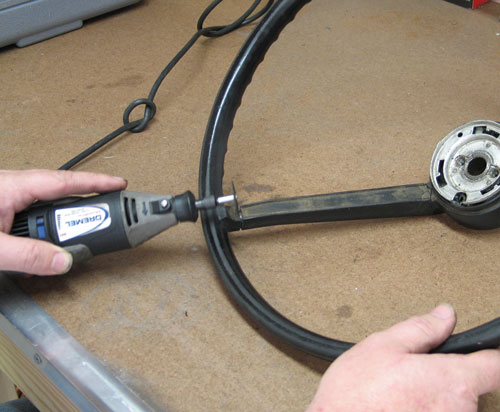
If you are not in possession of a high speed rotary cut-off wheel, get one. It will make fast work of all the cracks. We like the Dremel brand but any other will do just fine. Use the no. 426 fiberglass cutoff wheels to V (bevel) your cracks.
We used a citrus-based cleaner to get the wheel a bit more spic and span. We then followed that up with a wipe down of lacquer thinner. Be sure to use rubber gloves when dealing with chemicals like lacquer thinner, as they can be quite toxic.
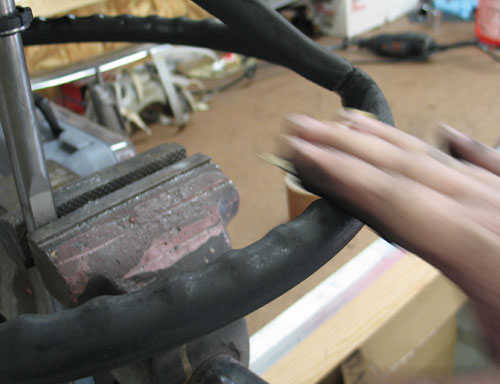
After our initial cleaning, we went over the whole wheel with 320 grit paper to give the primer a base to stick to. It’s a good idea to hit this with a pre-cleaner as well.
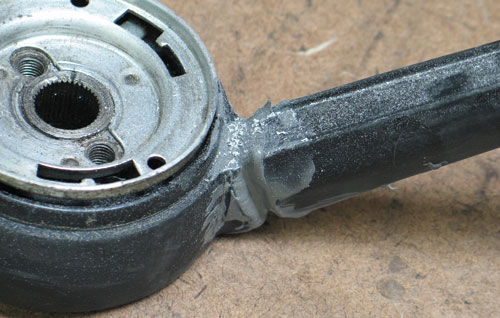
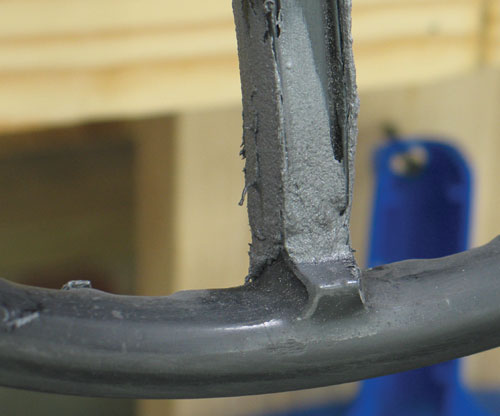
All of the gaps got an initial fill of PC7.
After the stuff has set, you’ll want to rough it down with 80 grit dry sandpaper. The PC7 should be mounded slightly higher than the affected area so you can sand down to it as shown. Note the pin holes and crater. These will have to be filled with a subsequent layer and sanded down.
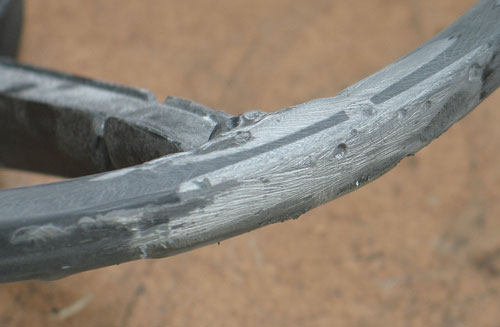
This is closer to finished. Here we have moved to a 320 grit sandpaper and planed it down to a nearly flat finish. The darker areas are places that will need additional filler. Forget about it! We hit this wheel in several areas a few times to get it just right. Note the higher spots.
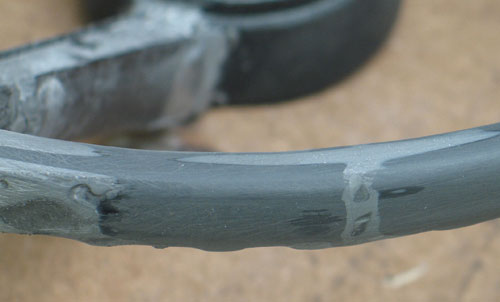
This is our first coat of self-etching primer. We sanded it and fixed the problems that became much more evident with the light gray primer. This step was repeated three times, with the next to last getting a sanding using 320 grit. The final primer coat got a light 600 sand and tack with a tack cloth before painting with our SEM Trim Black. We encountered some problems with "fish eye" in the primer and had to spray the part with some adhesion promoter. We recommend getting some of this in the spray can when dealing with steering wheels as the oils form your skin can be very hard to remove from the wheel- even with sanding. We finished the task with a first light coat of SEM Trim Black, then three coats of heavier spray, then final protection with SEM Flexible Clear Coat Satin.
Our thanks to Jeff Ford for this article. Visit Jeff's website for plenty of useful videos on restoration tips. http://www.autorestomod.com/


