Crankshaft & Bearing Removal
- Aug 14, 2015
Removal and replacement of the crankshaft and main bearings
Time: 2 hours
Tools: standard socket set, crankshaft socket, breaker bar, feeler gauge
Cost: approximately $50 for bearings and supplies
Tinware: quality set of replacement main bearings, Plastigage
Tip: If you plan to remove the crankshaft while leaving the rod and piston assemblies in the bores, attach a rubber band to a bolt on each rod and to a reinstalled oil pan bolt. This will keep the rods off to the side and from banging into the block when pulling the crank out.
Performance gains: a stronger, longer-lasting bottom end
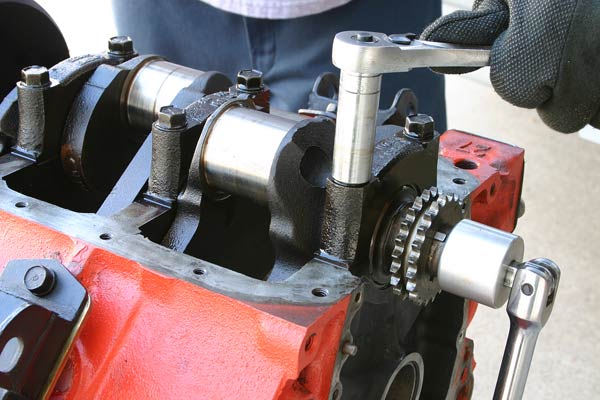
Start by removing the main bearing caps from the cylinder block.
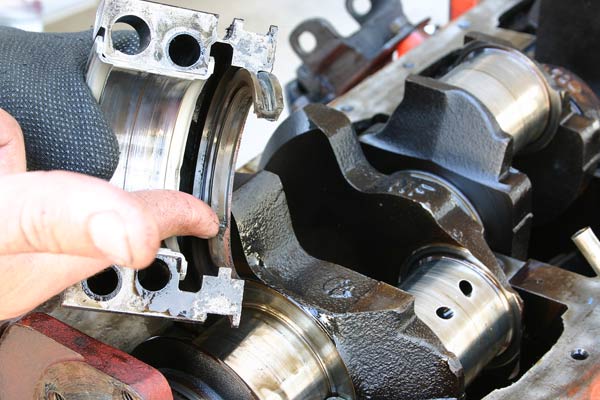
Underneath the rear cap you will find both the rear main oil seal and the crankshaft thrust bearing.
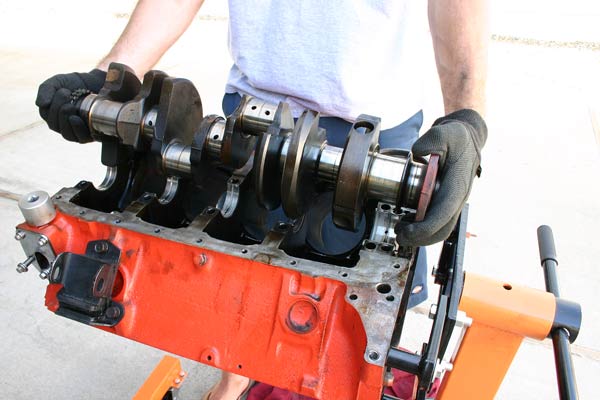
The crank can now be hoisted from the engine block and the upper main bearings removed from their saddles.
The process of removing the crankshaft and replacing the main bearings is very similar to that of the connecting rods and rod bearings. In fact, it’s pretty much identical. For reference, see our blog entitled: Connecting Rods And Rod Bearings. Although it may be possible in some applications to do so with the motor still in the vehicle, I would not recommend it. It’s best to have the motor out of the chassis in a clean and well-organized working environment.
Obviously, the oil pan and pump must first be removed to access the crankshaft and the main bearing housings. With the rods out of the way, start by unbolting the main bearing caps from the engine block. Depending on the design of the block, there will either be 2 or 4 bolts per main cap. The four-bolt blocks were used in most factory special high performance motors for added strength and rigidity. Be sure to mark the location and direction of the main caps prior to removing the crankshaft. Also note the position of the keyway in the crank so it may be installed in the same orientation.
Like its fellow rod bearing, the main crankshaft bearing consists of two halves or shells; one in the recess of the cap, and one in the block. When properly tightened, the two come together to create a seamless casing around the crankshaft journal. Check both the upper and lower halves of the bearings for any irregular wear or scoring. Always replace the two shells together, regardless if one side still appears to be in good shape. Once the bearings have been installed, recheck all clearances. Spin the crank by hand to check for any excessive drag in the rotation. Torque all of the main bearing caps to the proper specification, excluding the thrust bearing cap.
On a typical small-block Chevy, the thrust bearing is located under the #5 main bearing cap. This is the furthermost rear cap. This bearing is designed to handle and minimize forward-thrusting loads coming up from the transmission. High plate pressures and thrust of the torque converter often cause the deterioration and failure of the thrust bearing, especially in high performance applications.
To align the thrust bearing and the crankshaft endplay, first hand tighten the thrust bearing bolts at the rear main cap. Using a clean pry bar, pry the crankshaft to its extreme rearward travel. Follow this by prying the crank to its extreme forward travel. This is to ensure the upper and lower thrust bearing surfaces are fully seated and aligned with each other. With the crankshaft still in the extreme forward position, tighten and torque the cap to the proper spec. To check the crank’s endplay, measure the gap between the lip of the crankshaft and the front of the rear main bearing with a feeler gauge. Endplay may also be measured at the thrust bearing. Acceptable tolerances generally range between .003”-.010”.


