Front Disc Brake Upgrade
- Jul 3, 2015
Installing front disc brakes
Time: 3-5 hours
Tools: standard socket set, standard wrenches, floor jack and jackstands, rubber mallet, ball joint separator or pickle fork, mini sledge
Cost: will vary depending on the components used; typically anywhere between $500-$1500
Tinware: disc brake kit, wheel bearing grease, brake fluid, brake cleaner, small rubber hose, “catch” container
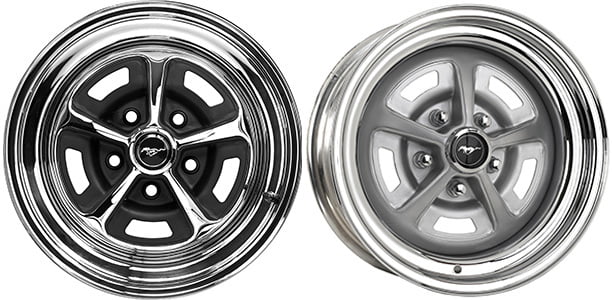
Tip: A much-overlooked detail in the disc brake conversion is the placement of the wheel by the hub assembly. Often times, the mounting plane of the new hub will cause the wheel to sit further outward in the wheel well. Depending on the wheel and tire size, this slight variance can create all sorts of clearance problems. Check it out before installing or assembling the parts!
Performance gains: Disc brakes are far superior to the age-old design of drums. They stop faster, last longer, and greatly improve the agility of your vehicle.
Today, disc brakes are a staple in the performance game. Anybody who still runs hard with the ancient, 4-wheel drum theory is seriously lacking.

Being forced to slam on the binders in a tight situation can be fatally scary! Drum brakes require a much longer distance to finally bring the car to a halt. They are also highly vulnerable to brake fade from excessive heat and water. Truth is, we often get so caught up in horsepower and the endless pursuit of going faster that we simply forget we have to slow down as well!
The only safe and effective way to harness big power is with the addition of disc brakes. Although discs require greater pressures between the pad and the rotor than those required on drums, they offer superior stopping resistance and handling under heavy braking. With discs, you also have the option of upgrading to larger-diameter rotors and calipers to further improve control. Keep in mind you may need to switch to a larger wheel to accommodate the new and improved rotors. Be sure to check your clearances beforehand. If you’re working off a budget (who isn’t these days?) and simply can’t afford the high-dollar items, vented or slotted rotors and carbon-metallic pads offer better-than-stock braking performance at an affordable price. In addition, they also keep the rotor and pad surface cleaner, lower operating temperatures, and improve wet braking.

Many disc brake kits come complete with everything you possibly need to improve your car’s braking performance.
Since most of the stopping force derives from the front wheels (approximately 60%-70% on rear-wheel drive cars), it goes without saying that the forward units should be addressed first. Front disc brake kits are everywhere. They are packaged and sold in various stages of completion, and range anywhere from $500 to $1500. It really just depends on what you need. Some kits are all inclusive with rotor assemblies, calipers and pads, master cylinder/power booster, and all of the necessary hard lines to adapt to your particular application. Others however, take a more bare-bones approach. Either way, Eckler’s supplies front discs for just about any older car.
Getting down to business, let’s remove the front wheels from the car. By now, everyone should be familiar with proper jacking and support techniques. With the wheels removed from the hub assemblies, gently pry the grease cap from the front of the hub. Next, remove the cotter pin, the castle nut and washer, and the outer wheel bearing from the spindle. Be sure to keep track of your hardware and the order in which it was removed. The old hub and drum are now free and clear for dismissal. It may be necessary to retract the shoes from the drum linings using the adjuster slot in the drum’s backing plate. Insert a small flat-blade screwdriver into the slot and back off the adjusting screw. If the drum continues to put up a fight, it may take a little “coaxing” from a rubber mallet to get things moving.
At this point, we recommend draining the brake fluid from the system. Start by using a siphon to draw out as much fluid as possible from the master cylinder reservoir. Attach a small hose to the bleeder screws and allow the remainder of brake fluid to be drained from the master cylinder and the brake lines into an empty container. Remove the soft brake hoses from the wheel cylinders as well. Be careful not get brake fluid on any painted surface– it will eat the paint right off.
As mentioned before, there are numerous different brake kits for all different cars. Although it’s not uncommon for some manufacturers to include replacement spindles as a part of the package, some kits are designed and intended to reuse your existing drum spindles. The step-by-step sequence may vary greatly depending on your selection of parts and the kit that best suits your needs. Follow the manufacturer’s instructions first and foremost during the procedure.
In our case, we were able to reuse the factory drum spindles. However, we opted to remove them anyway for cleaning and re-painting. Using a pickle fork and a mini sledge hammer, we separated the tie rod and the ball joints from the spindle assembly. If preferred, the drum and hub assemblies may be removed from the vehicle as one complete unit without the disengagement of the steering knuckle. This is entirely up to you. Simply unbolt the backing plate from the spindle assembly and remove the unit as a whole.
If you purchased a fully assembled kit, the rest is pretty straightforward. Attach the knuckle assembly to the control arms and tie rods, and re-fasten the lines and hoses. Although our kit came unassembled, it was pretty straightforward in its own right. After the fresh paint on the knuckles had dried, we installed the supplied spindle brackets and the new backing plates. Thoroughly grease and install the new inner wheel bearings into the hub/rotor assembly. It is highly important to keep the bearings clean and free of all dirt and debris. The bearings can be lightly tapped into place with a clean, rubber mallet or large socket. Be careful not to damage the lip or the seal of the bearing while doing so.

It’s important to heavily grease the bearings before installation.

Install the rotor assembly onto the shaft of the spindle as shown.

The caliper is secured to the caliper mounting bracket with grade 8 bolts and lock washers.
The freshly-packed rotor may now be installed onto the shaft of the spindle. Install the outer bearings and again, grease heavily! The spindle nut and washer should be loosely fitted over the bearing, but not tightened. The calipers may be assembled and installed onto their designated rotor. Once the unit is complete, mount the spindle assembly back into the car and torque the bolts to the proper specifications. To seat the outer wheel bearings, torque the spindle nut to approximately 15 lb-ft while spinning the rotor. Back off the nut 1⁄2 turn, retighten, and install a new cotter pin and grease cap. Refill the system with the recommended brake fluid and bleed thoroughly.
As with any aftermarket kit, be prepared for the unexpected. Fabricating new hard lines is not uncommon with a disc brake swap. Neither is relocating or re-plumbing a proportioning valve. There are many factors to consider before laying down the plastic and ordering a new kit. It’s always a good idea to call the tech-support lines prior to purchasing and pick their brain on any gray areas. Each kit will most likely be different in one way or another. Always follow their instructions to the letter.


