Carpet Installation Know-How
- Aug 24, 2016
Installing new carpet and sound deadener
Time: several hours
Tools: standard socket set, standard wrenches, Phillips screwdriver, scraper, utility knife, scissors, heat gun (recommended)
Cost: approximately $350-$500 for sound deadener, $200 for carpet
Tinware: carpet, floor pan sound deadener, spray adhesive
Tip: After purchasing a new carpet kit, remove the pieces from the box and lay them out flat. This will help take the folds and creases of packaging out of the carpet before it goes into the car. If the weather permits, lay the carpet outside in the direct sun with the plastic backing facing up- allowing the sun’s heat to soften the mold and ease in the installation.
Performance gains: a quiet, factory-fresh looking floor

As we all know, the interior carpet is subject to some of the most brutal and constant abuse your car will ever see. How many times have you launched a full soda or cup of coffee into your floorboard only to let it sit there as you watch the carpet soak it up? If you’re lucky, you have a dark colored interior that will help mask the ever-popular blunder and minimize the spill area (except for the stench and stickiness, that is). Today, it’s just a part of operating an automobile and multi-tasking half a dozen other things at the same time. When you think about it, the possibilities are frightening! Anyway, I guess you can say the carpet is kind of the “catch-all” for all of our daily driving needs and negligence. When you mix that in with 40+ years of intense engine heat and floor pan moisture, the results can be startling.
For these specific reasons, installing new carpet and sound deadener is always near the top of the list after any purchase. It will make a drastic difference in your interior, regardless if any other changes are made or not. The cost of original style replacement carpet is in the neighborhood of around $200, and can be ordered from any of Eckler’s brand websites.
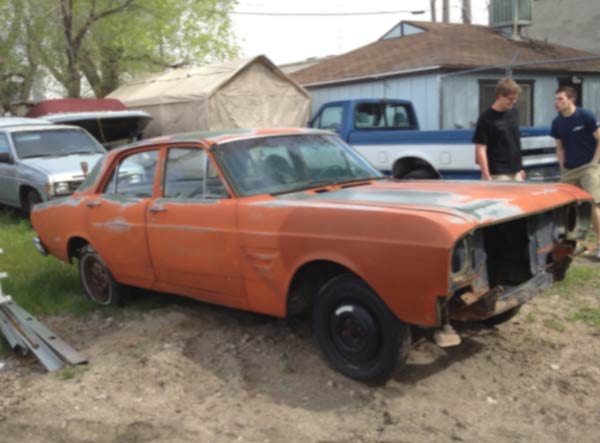
Getting down to business, the first order of the day will be to completely gut the floor of the interior. Remove the front and rear seats, the seat belts, the door sill plates, the kick panels, the floor shifter, and the center console if so equipped. With the floor stripped of all its attachments, it’s time to give the old rug the heave-ho! And no, there is no reason to save the mess. However, be careful and move slowly when pulling the factory carpet up off the floor pan. Often times the build sheet of the car was attached to the underside of the carpet or even folded and taped to the pan. These sheets are much sought-after and thoroughly explain and validate by code the factory build of that particular vehicle. Oddly enough, I have found multiple build sheets of different cars under the same carpet! Let me tell you, nothing is cooler than buying an old beater, taking it home, ripping apart the interior, and scoring the original build sheet. Not only does it serve as a great point of reference, but it also lets you know the car has not been previously dismantled or altered. This can be a huge vote of confidence after forking out your hard-earned cash on some car you didn’t have a clue about.
On the other hand, removing the factory sound deadener is a little less exciting and a lot more labor intensive. Most factories at the time utilized tarpaper insulation as a cheap way to shut out extreme high and low temperatures and excess noise. Although the material leans a bit on the heavy side, the stuff actually works very well. However, pulling it up cleanly and completely is another matter altogether. Get out your best scraper and a drum full of elbow grease, and have at it! After you knock the big stuff down, switch to a power drill or an air compressor with a wire wheel attachment. This will clean up the cracks and crevices of the pans a heck of a lot faster than a toothbrush will. How far you want to go is entirely up to you. If you plan on refurbishing and rust-treating your floor pans while you’re at it, then make sure everything is totally stripped clean and free of all old residue and grease. At this point, you may want to consider some long-term protection offered by products such as POR-15 rust paint.
Go to http://www.dearbornclassics.com/ and in the search window, enter: POR-15 for details.
The tarpaper insulation is applied with a high-heat source such as an adjustable heat gun, and stuck to the floor pans in the precut pattern. If the deadener covers seat belt holes or the mounting holes of the front seat, now is the time to cut provisions in the material to allow access of the bolts.
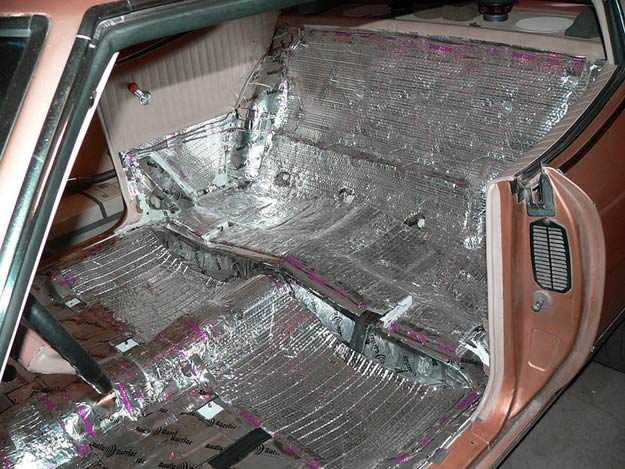
The owner of this car went all-out with his sound deadener. Sure, it’s more expensive to cover the vast majority of your car’s interior, but the results will net a very quiet, modern car ride.
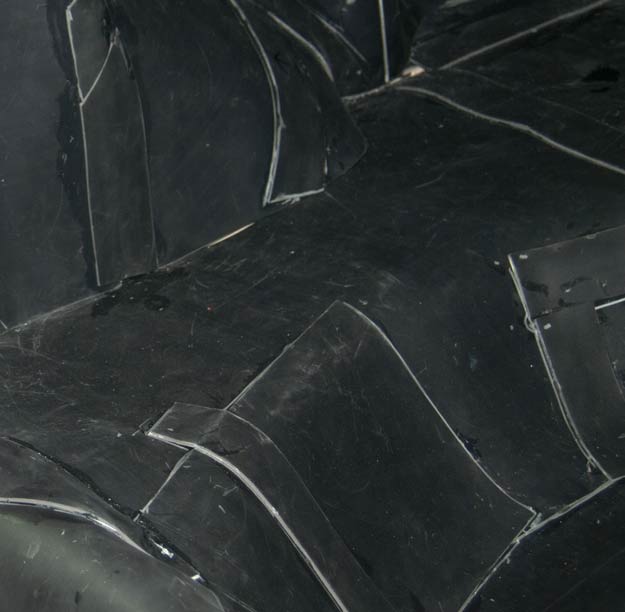
It doesn’t matter how pretty it looks. Sound deadener can be cut/wedged/glued in any combination. Since it’s all be covered by carpet, you don’t have to get artistic here.
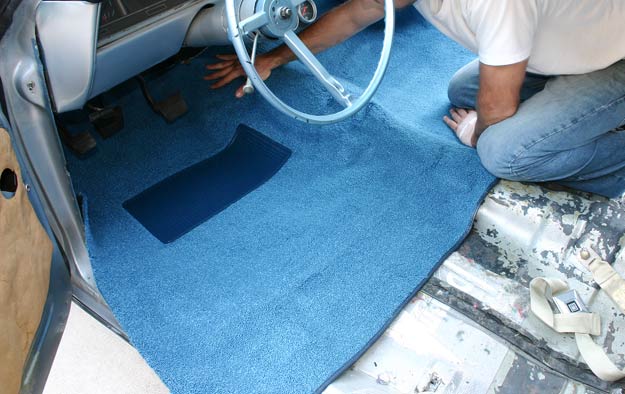
After you’ve got your sound deadener in position, start the carpet install by loosely fitting the rug into position. Use the center hump in the floor as the focal point and work your way down into the pans. Here, we’re test fitting the carpet before the insulation has been applied.
Most carpet kits are cut slightly oversized to ensure the proper fit. Cut the excess sides of the rug with a pair of sheers or a sharp utility knife.
Laying the carpet is a relatively basic procedure, but requires much attention to detail for the best results. Most aftermarket carpet kits are pre-molded and designed to fit the shape and contour of the factory floor pan. Since the front piece always overlaps the rear, I have found it easier to install the rear section of the carpet first. Place the rug into the rear floorboard area and glue it down in the corners with some spray adhesive. The rear top flap of excess carpet should also be folded over and glued down to sit under the bottom of the rear seat. Each side will most likely require minor trimming to neatly tuck the carpet back underneath the rear panels and the windlace. Take your time and be careful not to cut too much. Your patience will definitely pay off in the long run.
Depending on the car, the front section of the carpet can prove to be a little more involved than the rear, and in need of greater modification. Obviously, floor shift/console cars will need to be heavily cut around the shifter area to fit. Start by loosely fitting the rug into a position that will cover the entire area of the pan. Most of the time, there is plenty of excess carpet on all sides to allow for necessary trimming. Use the center hump in the floor pan as the focal point- working down from the hump into the passenger and the driver side pan. In tightly bunched areas, apply direct heat to the plastic backside of the rug with a heat gun. This will result in a softer, much more flexible material to work with temporarily. At this point, spray the back of the carpet with adhesive and stretch it into place. If the problem still persists, you may need to cut a small slit into the rug– forcing it to lie flat without bunching up or creasing.
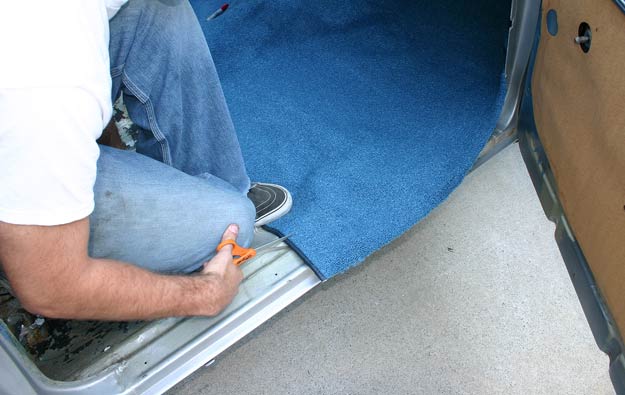
Once the carpet is thoroughly tacked down, grab a sharp utility knife and a pair of sheers, and trim off all of the overhanging material. Focus on one area at a time, and be sure to leave enough carpet to tuck back under the kick panels and the door sill plates. Cutting out the shifter hole on a floor shift car is basic. With the carpet fully installed, make a small incision with a utility knife in the center of the hole. Slowly extend the cut to each side of the opening, and remove the excess. The shifter boot or console will completely cover the hole and its surrounding area, and will make for a clean finish. Lastly, don’t forget to cut through holes in the carpet and sound deadener for the seat belts before reinstalling the seats.
Tip: you can always locate the holes from the underside of the car and punch through the bottom with a sharp nail if needed).
Shop for classic Ford parts at www.DearbornClassics.com
Follow us on our Dearborn's Facebook pages. Click here and Like us!