


1955-57 Bench Seat Relocation Brackets
- Oct 10, 2013
By: Randy Irwin
Randy has been involved in the Chevy parts business for over 25 years. He is a wizard at creating, making and modifying custom parts for Chevys.
That front seat just won’t go back quite far enough, will it? We must be giants compared to the people back in the 50s... or perhaps we have all gotten a little bigger around the equator in our old age. Installing a tilt steering column can make things even tighter as they are slightly longer than the stock column. Or perhaps you have a floor shifter that hits the seat and you just don’t want to change shifters or modify the seat. A simple solution is to relocate the seat further back in the car. But, if you move the seat back on the floorboard, the rear legs of the seat tracks will drop off the seat platform and lean to the rear. Plus, new holes would need to be drilled in those nice stock floorboards. Classic Chevy has developed a simple bracket system that bolts to the floor using the stock mounting holes. The seat will be relocated toward the rear of the car 4”. Best of all, no new holes will need to be drilled in the floor.
Parts Needed:
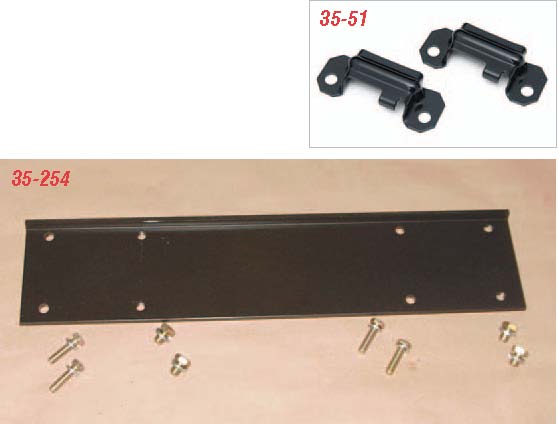
35-254 1955-57 Seat Relocation Brackets
35-51 1955-57 Bench Seat Floor Clips
To order parts call 1-800-456-1957 or visit ClassicChevy.com
Tools Needed:
1/2" Socket
9/16" Socket
Ratchet
Time Frame:
1 Hour
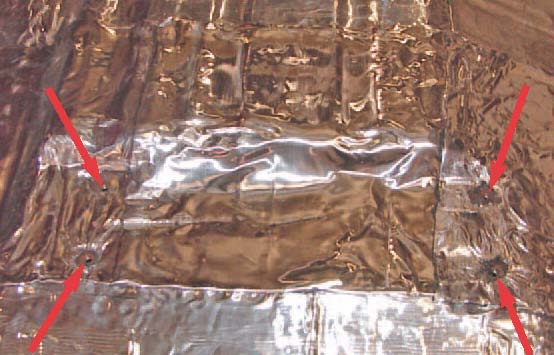
Photo #1:
The factory bench seat is bolted to the floor of the car with four 5/16" bolts per side. There are four nut inserts per side welded to the seat brace under the floor that the bolts thread into.
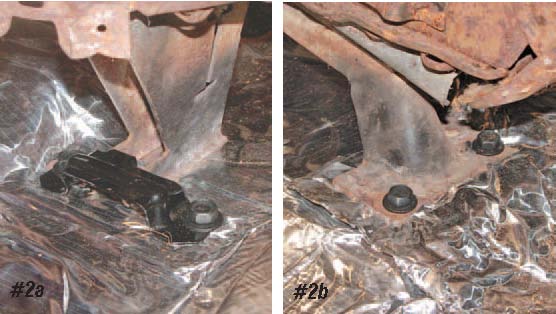
Photo #2a and 2b:
The front of the seat tracks have a "foot" that fits under clips P/N 35-51 that is bolted to the forward floor seat brace. At the rear of the seat, the track has two holes that bolt directly to the floor.
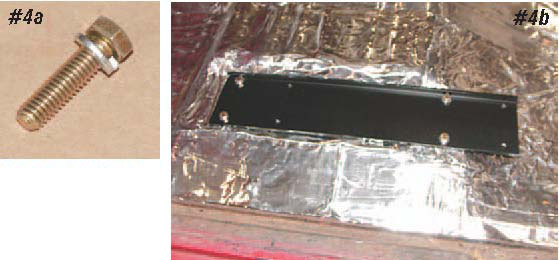
Photo #4a and 4b:
The relocation brackets include grade-8 hardware. The brackets are held to the floor with 5/16" x 1" course thread bolts and lock washers. These bolts are plenty long enough to reach through any floor insulation and hold the brackets securely to the floor.
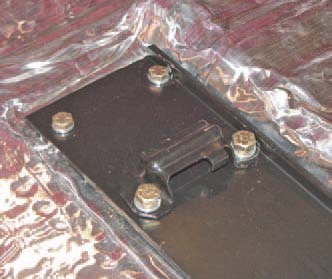
Photo #5:
The holes in the stock front seat clips P/N 35-51 will accept the new 3/8" x 1/2" fine thread bolts and lock washers. Attach the seat brackets to the seat relocation brackets using the 3/8" bolts and lock washers leaving the bolts loose at this time.
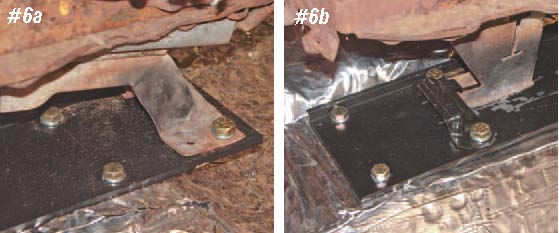
Photo #6a and 6b:
The holes in the seat legs at the rear of the seat frame will also accept the new 3/8" bolts. Using the 3/8" x 1/2" fine thread bolts and lock washers provided, bolt the seat into place. With the rear legs of the seat frame in place all of the seat mounting bolts can be tightened.
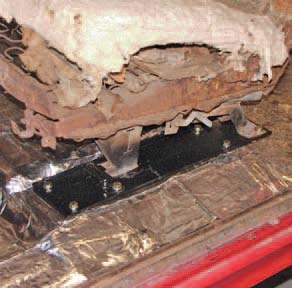
Photo #7:
With the seat bolted in place using the new relocation brackets, the seat may be adjusted back an additional 4". It’s AMAZING what an additional 4" of seat travel can do! The overhanging tail of the brackets can be hidden with your rear floor area carpet.
Shop for Tri-5 Chevy parts at www.ClassicChevy.com
Follow us on our Tri-5 Facebook page. Click here and Like us!


